Sunday, November 28, 2010


We are excited to present to you, 'Deck the Walls', your guide to gift {giving} and {getting} this holiday season!
We have made a list of our {Favorite} vinyl applications.
{Click} on each one to see a individual post.

Vinyl {Nativity}

I {love} this time of year
The hustle and bustle
The smell
The attitude of {giving}

What better way to introduce this HOLIDAY season
than setting up a Nativity

A {Vinyl} nativity set is just what you need

Add the Nativity to a mantle
backsplash
wall
picture frame
and the list goes {on and on}...


Whether you have a large space
or a small one..
we have the right size design for you

{Glitter} Vinyl

Who loves sparkly things?
Your love for {sparkly} things doesn't have to stop at vinyl!

I took some ornaments,
applied vinyl,
use my {favorite} Mod Podge
and added glitter.

This process could be done on any moveable object*


* the object must be moveable so you can apply and then shake off the glitter

Ornaments

What better way to add some unique holiday decorations

Holiday Vinyl Ornaments

These could be a great memory keepsake
or a great teacher gift!
The possibilities are endless

{Growth} Charts

Kids grow up {sooo} fast
Growth charts offer a fun way of recording your childs growth
As always, we here at BloomingWords, would love to customize a {growth chart} just for you!

Vinyl {Banners}


You've seen paper and fabric banners
all over blog-land

We are excited to share with you our own version

These can be customized to a particular {size, color, pattern}

Perfect for:
Birthdays
Baby Showers
Holidays
Nurseries
Bedrooms

With all of our vinyl products, {Banners} are easy to install and easy to remove

Santa's Plate {& Reindeers' too}

Santa's Sweets and Reindeer Treats!
Don't let Santa and his Reindeer go hungry this year!
These come as simple kits that you and your family
can put together

How fun for kids to make {Santa} his very own treat plate

Recipes

Do you have a favorite Holiday {recipe}?
How fun to display that recipe for all to see!

That recipe could be placed on the front panel of a cupboard
or on a whole panel (i.e. see the picture above)

Or create a keepsake with {Grandma's} award winning recipe
on a decorative plate for generations to enjoy


Christmas {Lights}

Looking for some Holiday Door Decor (say that one 3 times fast!)?
How about some Christmas Lights that DON'T have to be plugged in?

Perfect for Doors, Mantles, Kitchens {Fridges}, Classrooms...


The 22" strand comes with (6) 3" bulbs and the 42" strand comes with (6) 6" bulbs.

Order multiple strands and seam them together to cover a whole wall!

Full Sized {Christmas} Trees


Do you live in a home that is not big enough for a Christmas Tree?
Are you on a budget and don't have the money to buy a tree and all the trimmings?
Well we have the solution for you!

A vinyl {Christmas} Tree!

Perfect for Dorms, Apartments, Homes, Basements!

Choose the height, color of ornaments and whether you want vinyl presents!

Friday, October 22, 2010

We are excited to show you a simple {Tutorial} today!
We hope this will be {one} of many ideas we are able to share with you.

Anyone have kids that like to dress themselves?
Kids that would like to wear {WHATEVER} they want?
Well we've got 2 of them runnin' around {...well Tiffany does, I'm just the favorite aunt :)}

We've come up with a simple way to organize outfits in order to make {your} life easier.

An easy way to pick out clothes {ahead} of time.

Days of the week, hooks, and hangers.
{And cute clothes}

Now I will warn you ahead of time....
I'm slightly OCD.
You are welcome to {eyeball} the letters but I feel better knowing that they are
{perfectly} level.
On a blank wall {mine was about 6' wide}, I placed blue painters tape across the wall.
One strip as high as I wanted the {top} row to be and another one approx 14" below that.
Remember...you may want to put the {top} row low enough
that your child can reach the hanger.

Then across that blue tape I drew a level line.

I staggered the {days} across the blue tape making sure they were evenly spaced.
Then rip off the excess tape. Leaving a small piece under each {day}.


Place each {day} so that the bottom on the word is along your "level" line.


Then of course, make sure it is {level}.
See, I told you I was a bit OCD.


Lift up the {day} without pulling it off the wall and remove your level line.


Now we have all of our days {level}.


Now comes the {fun} part!
Before we start sticking things to the wall, make sure your vinyl is pressed well onto the transfer tape by rubbing it with a vinyl applicator or a {credit card}.

Lift up the vinyl without pulling your tape off.

{Slowly} begin to pull the backing paper at an angle.
If the vinyl is not stuck to the transfer tape completely, place the backing paper
back over it and rub a little more.

Pull {slowly} until all the backing paper is removed.

While firmly pulling down at opposite corners
{but not too hard!}
adhere your vinyl to the wall.

Again, rub the surface of the vinyl to make sure all edges are stuck to the wall.

Roll the {transfer tape} back slowly, making sure the vinyl is attached to the wall,
until all of the transfer tape is removed.


{Ta-Da!}

Rinse and Repeat!
Well...just {repeat} on the remaining days.

Attach removable hooks and {cute} hangers.
BTW..those hangers are easy and so fun to make!
Wouldn't they make a cute {baby shower} present?
Matching hangers for all your hand-made clothes.
I'll show you how to make those {tomorrow}.

Here's the finished product.
{Cute} and functional.
Takes all the hassle {out} of deciding what to wear!

Only thing left to do...
hang some {clothes}.


I'm thinking I might need one of these!
I could get {ready} so much faster in the mornings if I didn't have to decide what to wear!
In fact, my Mr. Fix All husband could use one of these...
but shhhhhh don't tell him I said that :)

Here is {Miss H's} very own dressing room.
On Sunday nights she gets to pick out {or at least help}
her clothes for the following week.


As always...{Blooming Words} products are fully customizable.
So head on over to our website and create your {own}!

-Ashley

{phone} 916-872-0739
Now on Facebook!

Wednesday, October 20, 2010

{Giveaway}!

We are so excited to be featured on {U-Create} today! Head on over to her blog and leave a comment. You have a chance to win a $30 coupon!


Stay tuned...
tomorrow we will have a few tutorials!


Sunday, October 3, 2010

{Tutorial} coming soon!

We are currently working on a {Tutorial} for the following project but couldn't wait to give you a sneak peek!

Any of you have kids in school? Let me guess...dressing for school can be somewhat of a {struggle}?

Tiffany, here at {Blooming Words} came up with the idea and we love it!
More details coming soon!

{Wedding} Bells

No...wedding bells are not ringing for any of us in the {Blooming Words} family but we did have the opportunity to provide vinyl for a local wedding.


Just as in our previous post {here}, vinyl is not just for walls!


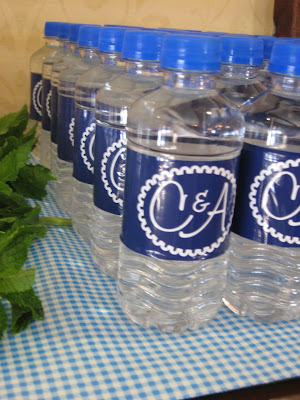
We created a {Simple Monogram} of the couples' initials, in their wedding colors of course. Wrapping them around the water bottles was easy and fast.
What a fun way to personalize that special day.

Congrats to the Happy Couple!


As always, we would love to create a custom design just for {you}!

{phone} 916-872-0739
Now on Facebook!

*Water Bottles not included.

Tuesday, September 28, 2010

{Vinyl}...not just for walls!

Walls aren't the only things vinyl can be applied to. What about those everyday items that might be in need of a little {sprucing up}?


What a fun way to personalize your things! The custom designs will last as long as you need them to but are easy to change! Laptops, mirrors, even your furniture can be customized for anyone of any age!

Contact us today for your custom design!

{phone} 916-872-0739
Now on Facebook!

Studio {21}

Remember this post?

We had the opportunity to do some more for {Studio 21}.

We were able to incorporate the zebra wall paper from inside the salon, around the border on the door. And the {pink}! Who says you can only use black or white? Let's have some fun!

Friday, September 17, 2010

{Trick-Or-Treat} Packs

Introducing a new product for this Halloween...Trick-or-Treat Packs.


What are they?
A fun vinyl sticker handout for your trick-or-treaters.

How many do I get and for how much?
The packs will come with 50 individually wrapped vinyl stickers. There are 5 Ghoul-ish designs and you'll get 10 of each one (each sticker is approx. 3"). Price per pack is $8.00.

Do I have color options?
Each pack will come in a single color, however, you may order multiple packs each in a different color.

Why chose a totally cool sticker that kids will love vs. handing out candy?
1. Many schools have gone to a 'No Sweets' policy so this is a great alternative hand-out!
2. Why choose? There's plenty of room in the bag provided to add other fun stuff such as candy, erasers or spider rings.

How do I purchase them?
Click Here to go directly to the Halloween section of our website.
http://www.bloomingwords.com/


Also offering 15% off all Halloween designs now through Oct.10th!